Mail für iOS
Mail für iOS isr das Standard-E-Mailprogramm in Apples iOS-Betriebssystem.
Diese Seite hilft dir, dein iPhone oder iPod zum Abrufen von Riseup-E-Mails einzurichten. Die folgenden Bilder geleiten dirch Schritte für Schritt durch den Prozess zum Einrichten eines IMAP-Kontos auf deinem iPhone.
E-Mailkonto hinzufügen
Leider wurde dieser Abschnitt noch nicht übersetzt. Hilf mit!
To get started you will need to first tap on the settings icon on your iPhone home screen:
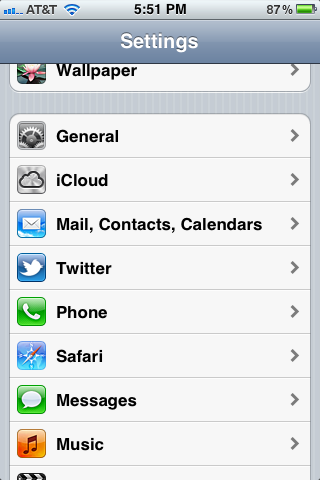
At this screen tap on “Mail, Contacts, Calendars” which should bring you to the screen below:
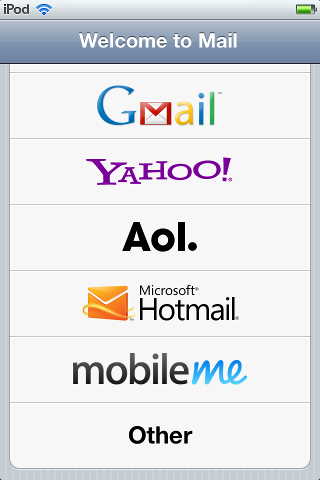
Scroll down to the bottom and tap where it says “Other”:
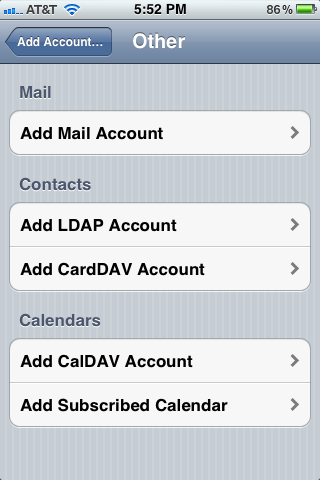
Tap “Add Mail Account”
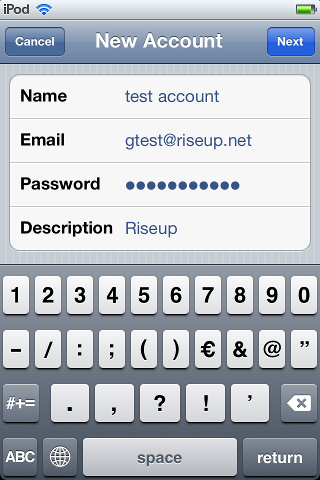
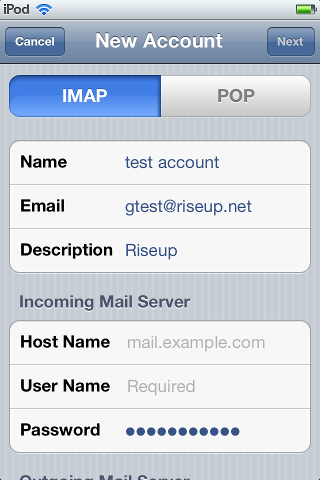
Fill out your account information
Add your information for your mail account. The “Name” area is the name that people recieving mail from you will be given as your name. The description area is to help identify this account on your phone if you have other mail accounts that you use on the same phone. You can put whatever you like there. When you’re done filling this area out tap next.
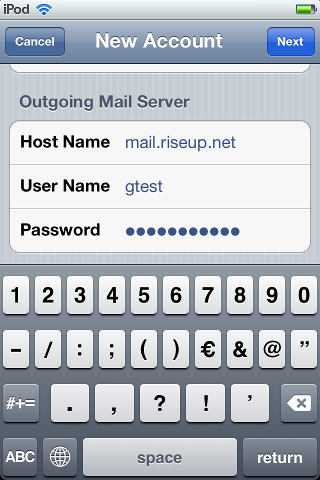
Set the outgoing server
Now fill out the outgoing mail server like follows:
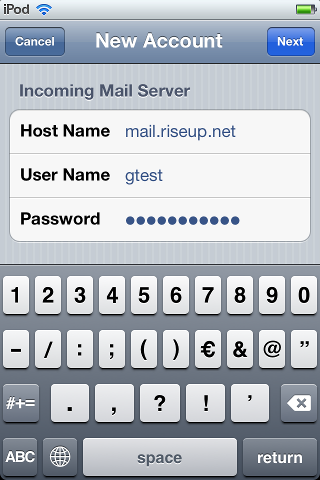
Set the incoming server
Make sure the incoming mail server looks like this, once it does, tap next:
Syncing other data
The next step might ask you if you want to sync notes, we do not support that, so leave that off, tap next to move on:

You aren’t finished yet!
You want to go back into that new account to check a few things. You should still be in the “Mail, Contacts, Calendars” section of settings, if not, from the home screen tap “Settings” then “Mail, Contacts, Calendars” then tap on your new account. It will be named exactly what you typed in the “Description” area above. (“Riseup” in our example), you should get yourself back here:
Scroll down to the bottom and tap “Advanced”, then you will see this:
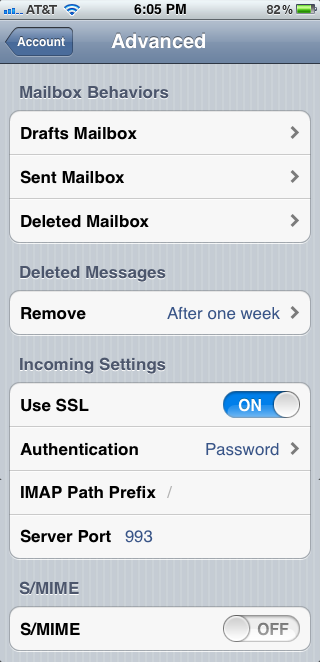
Here you can set your iPhone mailboxes they sync up with your imap mailboxes, tapping on “Drafts Mailbox” will allow you to store messages you’re drafting on your iPhone on the server so you can work on them later from another computer. Similarly, the “Sent Mailbox” and “Deleted Mailbox” will allow you to access items sent or deleted from another computer as well. We call the “Deleted Mailbox” Trash.
If you don’t use drafts, sent, or deleted folders you don’t need to set these up.
Finally, make sure that SSL toggle is switched to on, and the other items match accordingly.
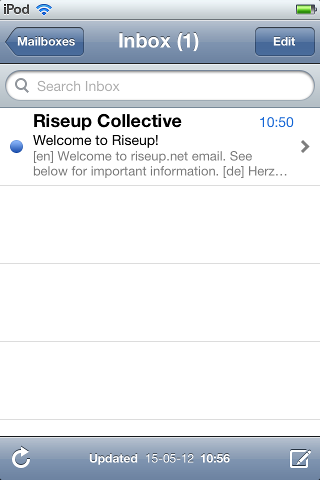
Finished!
That’s it, your mail should be all setup now:
Enhance your email security
- Aktiviere niemals sichere Passwörter oder sichere Authentifizierung. Diese Begriffe suggerieren fälschlicherweise mehr Sicherheit. Diese Methoden erfordern aber, dass auf dem Emailserver eine Kopie des Passwortes im Klartext gespeichert wird. Aus unserer Sicht ist das ein Sicherheitsrisiko, also bieten wir diese Funktionen nicht an. Weil die Verbindung zu Riseup ohnehin verschlüsselt ist, besteht dafür auch kein Bedarf.
- Verschlüssel deine E-Mails! Benutze OpenPGP zur Verbesserung deiner Nachrichtensicherheit.
- Die sichere Verbindung kann TLS oder StartTLS sein. Aus Sicherheitsgründen bieten wir SSL nicht mehr an. Du solltest StartTLS nicht mehr benutzten. Es ist viel besser, das reguläre TLS zu verwenden. Um deine Datensicherheit zu verbessern, kannst du in deinem Account den Verbindungstyp von StartTLS auf TLS ändern.
- Es gibt viele Angriffsmöglichkeiten auf gesicherte Verbindungen. Wenn du hohen Sicherheitsbedarf hast, solltest du in Betracht ziehen, dich zu allen Riseup-Services durch das Riseup VPN zu verbinden. Das beugt gegen viele Angriffsmöglichkeiten auf deine Kommunikationsdaten vor.
- Mit Onion Service configuration kannst du Riseup’s .onion services für IMAP and SMTP benutzten. Die passenden
mail.*.onionundsmtp.*.onion-Adressen findest du auf der verlinkten Seite. In den Einstellungen vom deinem Mail-Client musst du nun einfachmail.riseup.netdurch die Onion-Adressen ersetzten. Hinweis: Der SMTP Port 465 wird oft von Exit-Nodes geblockt. Port 587 ist dann aber oft dennoch verfügbar. Wenn ein Problem beim Senden von Mails besteht, benutze Port 587, oder konfiguriere dein Programm, Riseups SMTP-onion-Dienst anstelle vonmail.riseup.netzu benutzen. Das ist besser, als deine Daten durch einen Tor-Exit zu schicken, weil es MITM-resistent ist, aber es erzeugt Fehler für das SSL-Zertifikat bei deinem Emailprogramm.